English
 Français
 Español
 Deutsch
 Italiano
 العربية



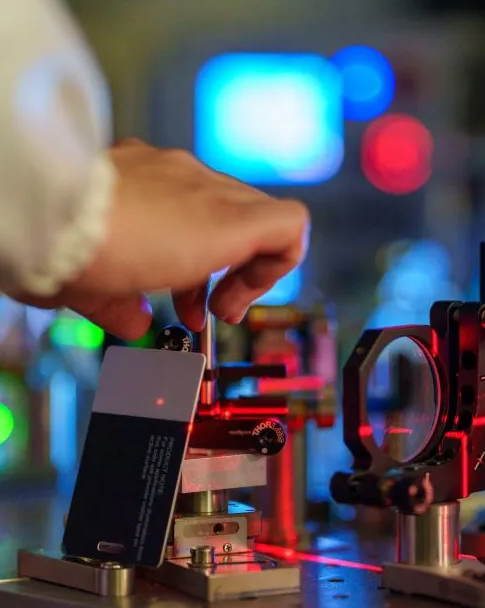

Sie können ein/e verwenden Infrarot-Adernfinder Wie Vivolight ermöglicht es, Venen schnell und sicher für die Nadelpunktion zu finden. Dieses Hilfsmittel trägt zu besseren Ergebnissen bei und reduziert Komplikationen während des Eingriffs. Neue Studien belegen klare Vorteile:
Infrarot-Venenfinder sind zu 85 % genau, herkömmliche Methoden hingegen nur zu 74 %.
Die meisten Menschen haben beim ersten Versuch Erfolg und benötigen weniger Zeit für die Kanülierung, insbesondere bei Kindern.
Studien in der Türkei und in Äthiopien zeigen, dass es den Patienten besser geht und sie weniger Stress empfinden.
Quelle: PubMed, Journal of Vascular Access
Wichtigste Erkenntnisse
Infrarot-Venensuchgeräte helfen Ihnen, Venen besser zu finden. Sie machen das Einführen der Nadel sicherer und schneller. In etwa 85 % der Fälle liegen sie richtig.
Bereiten Sie Patient und Gerät vor, bevor Sie beginnen. Dies erleichtert die Sicht auf die Venen und sorgt für mehr Komfort für den Patienten.
Halten Sie den Venenfinder senkrecht. Verändern Sie die Beleuchtung im Raum, falls Sie die Venen besser sehen müssen.
Markieren Sie die Stelle, an der die Vene verläuft, sorgfältig. Dies hilft Ihnen, die Nadel an der richtigen Stelle zu platzieren und reduziert die Schmerzen für den Patienten.
Nutzen Sie den Venenfinder regelmäßig, um Ihre Fähigkeiten zu verbessern. Übung hilft Ihnen, gute Arbeit zu leisten und Ihre Patienten optimal zu versorgen.
Infrarot-Venenfinder: Schritt-für-Schritt-Anleitung
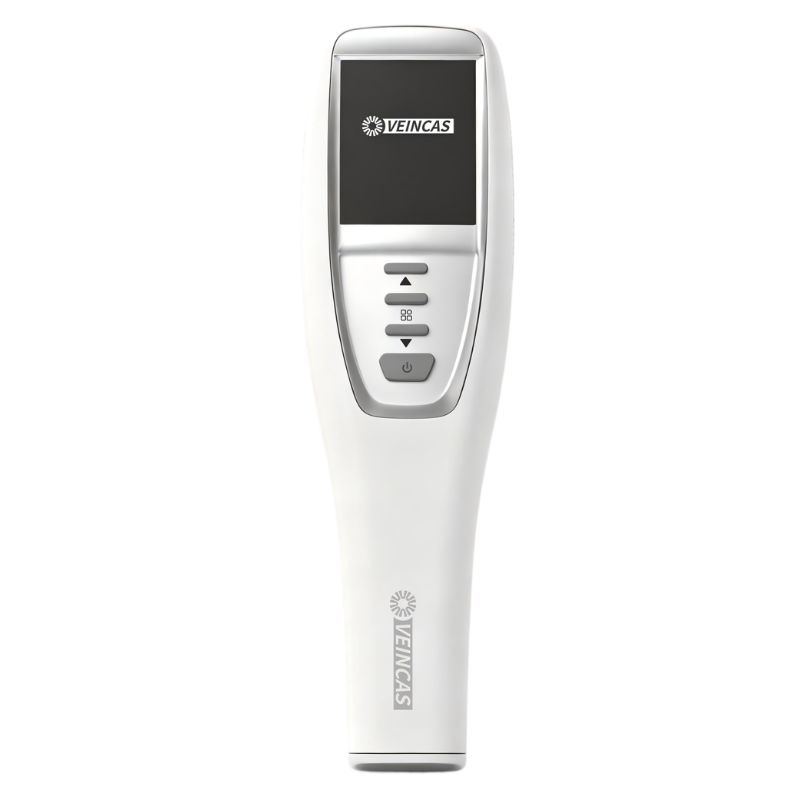
Bereiten Sie das Gerät und den Patienten vor.
Vor Beginn der Venenpunktion und Blutentnahme müssen sowohl das Venensuchgerät als auch der Patient vorbereitet werden. Dies trägt zu optimalen Ergebnissen bei. Gehen Sie dabei wie folgt vor:
Reinigen Sie den Venenfinder mit einem Desinfektionstuch. Dadurch bleiben die Bilder klar und Infektionen werden verhindert.
Kalibrieren Sie das Gerät gemäß den Anweisungen des Herstellers. Dieser Schritt stellt sicher, dass die Venenfindungstechnologie korrekt funktioniert.
Prüfen Sie den Akkustand. Ein geladenes Gerät funktioniert während des Vorgangs weiterhin.
Passen Sie die Raumbeleuchtung an. Gedämpftes Licht hilft Ihnen, die Venen mit dem Infrarot-Venenfinder besser zu erkennen.
Bitten Sie den Patienten, sperrige Kleidungsstücke und Schmuck aus dem betroffenen Bereich zu entfernen.
Lagern Sie den Arm des Patienten unterhalb des Herzens. Dadurch wird die Durchblutung angeregt und die Venen sind besser sichtbar.
Stützen Sie den Arm mit einem Kissen ab. Dadurch bleibt der Arm während des Eingriffs ruhig.
Sorgen Sie für ausreichende Beleuchtung, wenn Sie die Haut deutlich sehen müssen.
Tipp: Sorgen Sie für ausreichend Flüssigkeit und Wärme beim Patienten. Flüssigkeitsmangel erschwert das Auffinden der Venen. Wärme verbessert die Sichtbarkeit der Venen. Sie können ein warmes Handtuch verwenden oder den Patienten bitten, vor dem Eingriff Wasser zu trinken.
Quelle: Clinical and Laboratory Standards Institute (CLSI)
Positionieren Sie den Venenfinder
Um die Venen deutlich zu sehen, muss das Venensuchgerät richtig gehalten werden. Das Gerät nutzt Nahinfrarotlicht, um die Venen unter der Haut sichtbar zu machen. Hier einige wichtige Hinweise:
Halten Sie den Venenfinder in einem 90-Grad-Winkel zur Haut. So haben Sie die beste Sicht auf die Venen.
Drücken Sie das Gerät sanft gegen die Haut. Dadurch kann das Licht die Venen besser erreichen.
Halten Sie das Gerät etwa 15 bis 25 cm über der Haut. Dadurch bleibt das Bild scharf.
Bewegen Sie den Venenfinder langsam am Arm entlang. So können Sie alle möglichen Venen sehen.
Dimmen Sie nach Möglichkeit das Raumlicht. Dadurch werden die Venen auf dem Bildschirm des Venenfinders besser sichtbar.
Tasten Sie die Stelle mit den Fingern ab, bevor Sie den Venenfinder verwenden. Möglicherweise können Sie eine gut sichtbare Vene ertasten, bevor Sie sie sehen.
Richtlinie | Beschreibung |
|---|---|
Optimale Raumbedingungen | Gedämpftes Licht verbessert die Sichtbarkeit der Venen. |
Richtige Positionierung | Halten Sie das Gerät im 90-Grad-Winkel und drücken Sie leicht. |
Palpationsbeurteilung | Vor dem Scannen auf oberflächliche Venen tasten. |
Venenkartierung | Um bessere Ergebnisse zu erzielen, bewegen Sie sich langsam durch den Bereich. |
Berücksichtigung der Transparenz | Einstellungen für verschiedene Hauttöne anpassen. |
Visualisierungsverbesserung | Verwenden Sie einen dunklen Hintergrund oder Alkohol, um den Kontrast zu verbessern. |
Interpretieren Sie das Venenbild
Die Venenfinder-Technologie projiziert ein Bild der Venen auf die Haut. Sie müssen wissen, worauf Sie achten müssen:
Achten Sie auf dunkle Linien oder Muster. Diese zeigen an, wo die Venen verlaufen.
Verwenden Sie die Helligkeitseinstellungen, wenn das Bild zu hell oder zu dunkel ist.
Manche Venenfinder verfügen über einen inversen Farbmodus. Dieser kann helfen, Venen auf unterschiedlichen Hauttönen sichtbar zu machen.
Prüfen Sie die Venen auf Verzweigungen, Klappen oder Krümmungen. Wählen Sie einen geraden Abschnitt für die Nadelpunktion.
Stellen Sie sicher, dass die Vene groß genug für die Nadel ist. Vermeiden Sie sehr kleine oder gewundene Venen.
Besonderheit | Beschreibung |
|---|---|
Helligkeitseinstellungen | Ändern Sie die Helligkeit für klarere Bilder. |
Bildgebungsunterstützung | Venen vor, während und nach dem Eingriff ansehen. |
Schnelles Scannen | Das Gerät macht Venen schnell sichtbar. |
Echte Zentrierungsgenauigkeit | Zeigt die Mitte der Vene zur besseren Zielgenauigkeit an. |
Immer im Fokus | Wirkt am besten in einer Entfernung von 15-25 cm über der Haut. |
Erweiterte Standortauswahl | Zeigt Adern, Verzweigungen und Klappen, die mit bloßem Auge nicht sichtbar sind. |
Geeignet für alle Hauttöne | Liefert klare Bilder für alle Hauttypen. |
Einfache Bedienung | Einfache Bedienung und ergonomisches Design. |
Markieren Sie die Venenstelle
Sobald Sie mit dem Venenfinder eine geeignete Vene gefunden haben, müssen Sie die Stelle markieren. Dies hilft Ihnen, die Nadel an der richtigen Stelle einzuführen.
Zeichnen Sie mit einem sterilen Hautmarker einen kleinen Punkt oder Strich über die Vene.
Drücken Sie nicht zu fest. Sie wollen den Patienten ja nicht verletzen.
Markieren Sie die Mitte der Vene, nicht den Rand.
Falls nötig, verwenden Sie den Venenfinder erneut, um Ihre Markierung zu überprüfen.
Technik | Heilungsrate | Verbesserungsrate | Ausfallrate |
|---|---|---|---|
Klinikmarkierung | 21,0 % | 26,3 % | 52,7 % |
Duplex-Markierung | 29,3 % | 22,8 % | 47,9 % |
Notiz: Durch das Markieren der Vene wird vermieden, dass Sie bei intravenösen Zugängen oder Blutentnahmen die Vene verfehlen.
Die Nadel sicher einführen
Sie sind nun bereit für die sichere Nadelung. Befolgen Sie diese Schritte für optimale Ergebnisse:
Vergewissern Sie sich, dass der Raum noch schwach beleuchtet ist.
Halten Sie den Venenfinder in einem 90-Grad-Winkel und überprüfen Sie Ihre Markierung.
Reinigen Sie die Haut vor dem Einführen der Nadel mit Alkohol.
Quelle: Centers for Disease Control and Prevention (CDC)Führen Sie die Nadel in einem flachen Winkel ein und zielen Sie dabei auf die Mitte der markierten Vene.
Achten Sie auf den Blutrückfluss, um sicherzustellen, dass Sie die Vene getroffen haben.
Entfernen Sie den Venenfinder, sobald die Nadel platziert ist.
Fixieren Sie die Nadel und beenden Sie den Eingriff.
Sicherheitsprofil | Wirksamkeitsdaten |
|---|---|
Bei der Verwendung eines Infrarot-Venenbetrachters sind keine Nebenwirkungen oder Risiken bekannt. | Klinische Studien zeigen höhere Erfolgsraten und einen geringeren Zeitaufwand für die Venenpunktion. |
Nichtinvasive und nichtionisierende Technologie | Die Patienten verspüren weniger Schmerzen und Beschwerden. |
Tipp: Befolgen Sie stets jeden Schritt für eine sichere und effektive Venenpunktion. Die Venenfinder-Technologie erleichtert und sichert den Vorgang für Sie und den Patienten.
Sicherheit und bewährte Verfahren
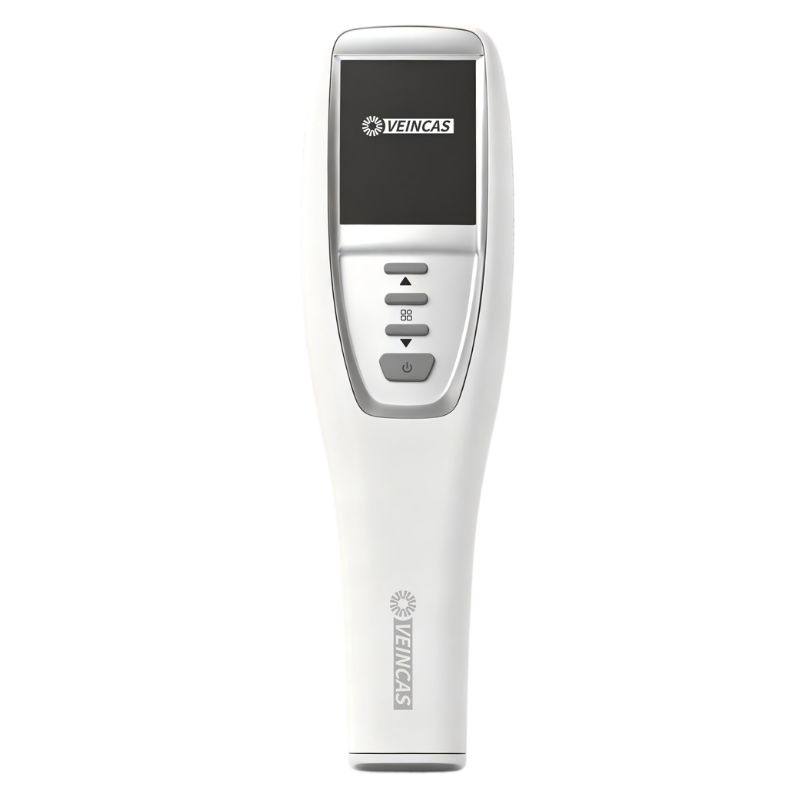
Hygiene und Gerätereinigung
Sie müssen den Venenfinder sauber halten. Dadurch wird die Verbreitung von Keimen während der Blutentnahme verhindert. Befolgen Sie diese Schritte, um die Sicherheit Ihrer Patienten zu gewährleisten:
Halten Sie Ihre Reinigungsmittel bereit. Ziehen Sie Handschuhe und andere Schutzausrüstung an. Waschen Sie Ihre Hände, bevor Sie beginnen.
Prüfen Sie den Venenfinder auf Verschmutzungen oder Beschädigungen.
Verwenden Sie ein mildes Reinigungsmittel und ein weiches Tuch. Wischen Sie alle häufig berührten Stellen ab. Reinigen Sie kleine Zwischenräume sorgfältig.
Spülen Sie das Gerät mit klarem Wasser ab. Trocknen Sie es anschließend mit einem fusselfreien Tuch.
Überprüfen Sie den Venenfinder erneut. Informieren Sie jemanden, falls Sie Auffälligkeiten feststellen.
Gebrauchte Reinigungsartikel richtig entsorgen.
Notieren Sie, wann Sie es gereinigt haben, die Uhrzeit und Ihren Namen.
Tragen Sie beim Verwenden des Venenfinders stets Handschuhe. Verwenden Sie sterile Handschuhe für spezielle Katheterisierungsverfahren. Reinigen Sie die Instrumententabletts und decken Sie wichtige Teile ab, um sie zu schützen. Desinfizieren Sie die Injektionsstelle mit einer Chlorhexidinlösung. Verwenden Sie sterile, verpackte Verbände für intravenöse Eingriffe.
Patientenkomfort
Sie können Ihrem Patienten helfen, sich ruhig und sicher zu fühlen. Viele Menschen sind weniger nervös, wenn ein Venenfinder verwendet wird. Manche Patienten sagen: „Wow, andere Krankenhäuser haben das nicht.“ Dieses Hilfsmittel kann den Eingriff beschleunigen und vereinfachen.
Versuchen Sie es mit Nahinfrarotlicht. Es hilft Ihnen, Venen schnell zu finden und den Katheter schneller einzuführen.
Damit sich Ihr Patient wohlfühlt:
Bringen Sie sie in eine bequeme Position.
Verwenden Sie eine Aderpresse, um die Venen besser sichtbar zu machen.
Vor dem Einstechen eine Betäubungscreme auftragen oder einen Kühlbeutel auflegen.
Sprechen Sie mit Ihrem Patienten und erklären Sie ihm jeden Schritt.
Schlagen Sie tiefes Durchatmen oder Musik vor, um sie abzulenken.
Kinder und Babys empfinden dank Venenfindern weniger Schmerzen und weinen weniger. Die sogenannte „Fliegende Nadel“-Methode kann dabei helfen, und viele Patienten bemerken die Nadel gar nicht. Studien zeigen, dass Menschen nach der Verwendung von Venenfindern bei Blutentnahmen weniger Angst haben.
Quelle: Pädiatrische Notfallversorgung
Häufige Fehler, die es zu vermeiden gilt
Sie können Probleme vermeiden, indem Sie mit einem Venenfinder auf diese Fehler achten:
Angstzustände können dazu führen, dass Venen kleiner und schwerer sichtbar werden.
Übergewicht, Tätowierungen und dunkle Haut können Venen verdecken. Ändern Sie die Einstellungen des Venenfinders, um bessere Ergebnisse zu erzielen.
Wenn man den Venenfinder zu nah oder zu weit entfernt hält, kann das Bild unscharf werden.
Das Auslassen von Reinigungsschritten kann zu Infektionen führen.
Wenn man nicht mit dem Patienten spricht, kann das ihn noch nervöser machen.
Die Venenfinder-Technologie reduziert die Anzahl der benötigten Punktionsversuche. Dies senkt das Infektionsrisiko und erhält die Venengesundheit für später, was insbesondere für Nierenpatienten wichtig ist.
Fehlerbehebung und Tipps
Wenn die Venen nicht sichtbar sind
Manchmal sind die Venen bei der Blutentnahme nicht sichtbar. Es gibt einfache Möglichkeiten, die Venen besser sichtbar zu machen:
Bitten Sie den Patienten, vor Beginn der Behandlung Wasser zu trinken.
Legen Sie ein warmes Handtuch auf die betroffene Stelle, damit die Venen besser hervortreten.
Weisen Sie den Patienten an, die Faust zu ballen oder die Hand zur Faust zu krümmen.
Klopfen Sie die Haut sanft ab, um die Venen zu öffnen.
Die Haut dehnen, damit die Vene an Ort und Stelle bleibt.
Die Transillumination kann helfen, wenn Venen unter dicker Haut, Schwellungen oder überschüssigem Fettgewebe verborgen sind. Die folgende Tabelle listet häufige Probleme und deren Behebung auf:
Häufiges Problem | Auflösung |
|---|---|
Unsichtbare Venen | Die Transillumination eignet sich zur Darstellung von Venen, die durch Fettgewebe, dunkle Haut, Schwellungen oder Dehydrierung verdeckt werden. |
Rollende Adern | Drücken Sie sanft, um zu verhindern, dass sich die Venen während des Einführens verschieben. |
An Hauttöne und Körpertypen anpassen
Die Venensuchtechnologie ist individuell verschieden. Hautton und Körperbau beeinflussen, wie gut Venen sichtbar sind. Infrarot-Venensuchgeräte sind besonders hilfreich für Menschen mit dunkler Haut, Übergewicht, Kinder und ältere Erwachsene. Nahinfrarotlicht verbessert die Sichtbarkeit der Venen bei übergewichtigen Patienten erheblich. Auch Faustballen und Handkraftübungen können die Venen besser hervorheben.
Ändern Sie die Helligkeit oder den Kontrast des Venenfinders, um klarere Bilder zu erhalten.
Bewegen Sie das Gerät langsam, um den Bereich abzutasten.
Versuchen Sie es mit anderen Blickwinkeln, wenn Sie die Vene nicht sofort sehen können.
Maximieren Sie die Genauigkeit des Venenfinders
Mit diesen Tipps erzielen Sie bessere Ergebnisse bei der Venenfinder-Technologie:
Halten Sie den Venenfinder ruhig und achten Sie auf den richtigen Abstand zur Haut.
Sorgen Sie für schwaches Licht im Raum.
Üben Sie regelmäßig, um das Gerät gut bedienen zu können.
Nutzen Sie die Venenfinder-Technologie täglich für intravenöse Zugänge oder Venenpunktionen.
Studien belegen, dass Schulung und Übung die Anwendung des Infrarot-Venen-Darstellers verbessern. Krankenhäuser, die ihr Personal schulen, verzeichnen häufig mehr Erfolge beim ersten Versuch.
Quelle: Journal of Vascular Access
Wann man Hilfe suchen sollte
Sie sollten wissen, wann Sie um Hilfe bitten sollten. Wenn Sie mehrmals versuchen, eine Vene zu finden, und keine finden, brechen Sie ab und rufen Sie jemanden mit mehr Erfahrung hinzu. Das schützt den Patienten und reduziert Stress. Um Hilfe zu bitten ist klug und zeigt, dass Ihnen das Wohl des Patienten am Herzen liegt. Krankenhäuser, die zusammenarbeiten und klare Regeln befolgen, erzielen bessere Ergebnisse, insbesondere bei schwierigen Fällen.
Erinnern: Der Einsatz von Venenfindertechnologie und das Wissen, wann man um Hilfe bitten sollte, können die Patientenversorgung verbessern und die Blutentnahme für alle Beteiligten sicherer machen.
Die Venenpunktion lässt sich durch die Verwendung eines Infrarot-Venenfinders in jedem Schritt verbessern. Bereiten Sie Ihren Patienten vor, wenden Sie die korrekte Vorgehensweise an und achten Sie stets auf die Sicherheit. Studien belegen, dass diese Geräte die Erfolgschancen beim ersten Versuch erhöhen und die Punktion beschleunigen.
Studienquelle | Wichtigste Erkenntnisse |
|---|---|
Pädiatrische Notfallversorgung, 2017 | NIR half den Menschen, mehr Erfolg zu haben und weniger Versuche zu benötigen. |
Zeitschrift für Gefäßzugang, 2017 | Übergewichtige Menschen hatten mehr Erfolg beim ersten Versuch. |
Sprechen Sie mit Ihrem Patienten, damit er weiß, was los ist.
Stellen Sie sicher, dass die Beleuchtung und die Armposition korrekt sind.
Verwenden Sie ein tragbares Venenfinder oder einen Venenfinder für bessere Ergebnisse.
Bitten Sie jemanden um Hilfe, wenn Sie es nicht alleine schaffen.
Diese Maßnahmen machen die Behandlung sicherer und tragen dazu bei, dass sich die Patienten besser fühlen.
Häufig gestellte Fragen
Wie funktioniert ein Infrarot-Venenfinder?
Ein Infrarot-Venenfinder sendet Nahinfrarotlicht auf Ihre Haut. Venen absorbieren dieses Licht, daher zeigt das Gerät dunkle Linien an, wo Venen verlaufen. Sie können diese Linien auf dem Bildschirm oder als Projektion auf Ihrer Haut sehen.
Kann ich ein tragbares Venensuchgerät zu Hause verwenden?
Sie können ein tragbares Venensuchgerät zu Hause verwenden, wenn Sie entsprechend geschult sind. Befolgen Sie stets die Gebrauchsanweisung. Wenn Sie sich unsicher fühlen, bitten Sie eine medizinische Fachkraft um Rat. Ihre Sicherheit hat oberste Priorität.
Worin besteht der Unterschied zwischen einem Venenfinder mit Projektion und einem herkömmlichen Venenfinder?
A Venenfinder für die Projektion Dieses Gerät projiziert das Venenbild direkt auf die Haut. Ein herkömmliches Venensuchgerät zeigt das Bild auf einem Bildschirm an. Beide helfen beim Auffinden von Venen, aber die Projektion ermöglicht es, die genaue Stelle besser zu erkennen.
Ist ein Infrarot-Venenfinder sicher für Kinder?
Ja, Sie können einen Infrarot-Venenfinder auch für Kinder verwenden. Das Gerät arbeitet ohne schädliche Strahlen. Es hilft Ihnen, Venen schnell zu finden, wodurch Nadelstiche für Kinder weniger stressig sind.
Was soll ich tun, wenn ich immer noch keine Vene finden kann?
Versuchen Sie, die betroffene Stelle zu erwärmen oder den Patienten zum Trinken aufzufordern. Falls die Venen nicht sichtbar sind, verwenden Sie ein tragbares Venensuchgerät oder ein Venensuchgerät mit Projektion. Sollten Sie weiterhin Schwierigkeiten haben, bitten Sie eine Fachkraft um Hilfe.

 IPv6 NETZWERK UNTERSTÜTZT